SIG SAUER X-FIVE P226 TAKE DOWN FOR STRIPPING AND PAINTING
This Article was graciously provided by one of my viewers: Lee
Related Posts:
DISCLAIMER, PLEASE READ AND UNDERSTAND!
- This walkthrough is for information purposes ONLY, if you decide to dismantle your BB gun you will void any warranty you have with the manufacturer.
- I will not be held accountable for your actions or any damage that is caused by your negligence. Therefore, if YOU decide to dismantle your BB gun and break something during the dismantling or assembling it is your problem not mine.
- If you don’t feel confident or comfortable doing any of these steps STOP and do not proceed any further or you may do damage.
- YOU WILL LOOSE ALL THE SIG SAUER MARKINGS ON THE GUN.
Having said all that, this is my first ever instructional so I’m going to try and make this walkthrough as easy as I can for you to understand. You will need the following: Flat tip Screwdriver for the grips, Small Philips Head screwdriver, small punch & needle nose pliers – the last 2 are optional.
Make sure you have a clean work space and lay out every part in the order that you remove it Left to Right, come reassembly time you work Right to Left it makes reassembly so much easier.
Step 1:
Field Strip the slide until it looks like this:

Unscrew these 2 screws, these hold in the “Breech Block” once your unscrewed cup the end of the slide in your hand and let the Breech & Screws fall in your hand – Set these aside.
That’s it your Slide should look like this:

It is now ready for paint removal.
Step 2:
Take the Frame and start removing the grips Left hand side first:

Flip the frame over and remove the right hand side grips:

Carefully remove the trigger return spring, it is under tension and it WILL fly across the room – I spent an hour looking for it one day! Also while we are at it, you can remove the cover to the magazine release.
To remove the safety, place your flat tip screwdriver between the frame and the safety and twist ever so gently this will separate the safety and all you need to do now is grab the safety from either side and gently pull & wiggle until it separates.
Once the safety is removed you will see the safety bar, this lifts off.

Step 3:
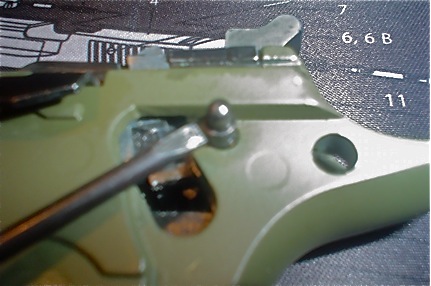
Lift this little pin out and remove the spring, very carefully push this pin from the other side and remove, be careful because once this happens your hammer assembly is loose and free from the frame.
Slowly and gently remove the hammer assembly:
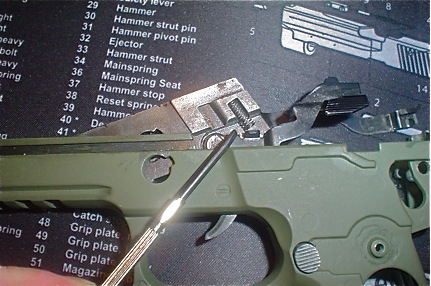
Note the little shiny piece that sits on the side of the hammer assembly, try very hard not to let this piece fly out, it is a pain to get back in, if it does fly out keep calm and take your time, don’t force the little spring in, it seats in behind the shiny metal thing – sorry I don’t have a proper name for it.
Also make sure that the spring next to it is in the locked open position, if it snaps back just get the tip of a small screwdriver and slide it to the left until it locks.
The hammer return spring assembly at the back of the grips can be removed and set aside.
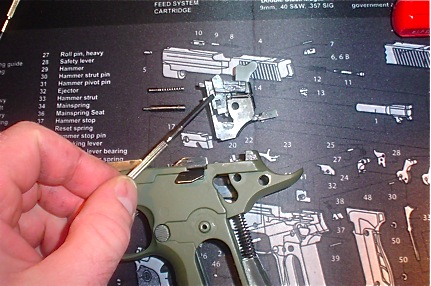
Removing the trigger assembly is easier than it looks; you need to remove the takedown lever by rotating it counter clockwise until it stops.

Push it through the frame and rotate it back clockwise to remove it all together.
Remove the screw holding the trigger assembly:

Lift out the trigger assembly; be careful of the slide lock spring it wont Fly out, but it will fall out.
If you want to remove the magazine release, there is a spring that sits at the rear of the trigger guard;

Push the magazine release in part way & with the flat tip screwdriver lifts the up to remove it, once removed the magazine release will simply fall out.
THAT’S IT! We’re done, ready for the paint removal. Any paint stripper is fine.
KEEP IT WELL AWAY FROM THE PLASTIC PARTS!
Follow the manufacturer’s guidelines for use of their product and thoroughly clean the slide and frame after you have removed the paint.
YOU WILL LOOSE ALL THE SIG Sauer MARKINGS ON THE GUN.
Rub over the slide and frame with #0000 Steel wool or 1200 grit Wet & Dry paper. Clean again and using the paper or steel wool with some ALUMINUM polishing compound like Autosol and some good ol fashioned elbow grease polish the slide and frame until you reach your desired outcome. Clean it all down again and wipe it down with a rag that has had gun oil or my preference “Fluid Film”.
Reassemble the gun in the reverse order and viola one shiny SIG Sauer X-Five.